03 Aug Maker’s Monday: Creature Features pt. 3
Good morning everyone, happy Monday! For this week’s maker’s Monday I’m going to be showing off the process of how I made Velvari’s tail! It’s a pretty easy little project, so let’s get straight into it!
First thing’s first, you’ll want to figure out the length you want for your tail. It’s most likely going to rest on your lower back so I’d recommend taking some flexible measuring tape and placing it at the base of the back to test how various lengths would fall. In the end I needed a long tail, but am a short person, so I went with 40 inches. 
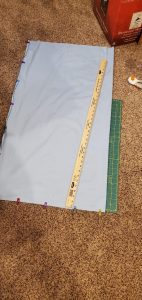
Once I’ve got my fabric and length picked out first things first: WASH IT. Okay now that you’ve done that get it ironed out and prepped for cutting and sewing. I want a tapered look so essentially it boils down to just cutting a really large triangle! To make sure it’s even on both sides I simply fold the fabric in half, clip it up so that it’s stable, mark the triangle I want with one of my yard sticks, and take a rotary cutter to it.
Now in a lot of cases you can sew this up, put stuffing in it, and call it a day. But when I was designing this character I was given leeway on how I wanted to make his tail look, so I ended up slightly basing it on a blue tailed skink, so I could have a bit of color variation with it. Originally the pattern was also supposed to go at the other end of the tail, but I screwed up when painting. The glory of doing your own character though, is that I can just alter his design slightly, and give him a little dark blue stripe along his spine to match the color of the portion that would be coming out of his back!
 Anyways, like I said, it needs to be painted. To make sure I can have a thin layer that will be easy to sew through I will be using acrylic paint mixed with a fabric medium. I will also be going the impatient route and decided to hand paint all of it in one go rather than do the tape up, paint, and wait method. Once you have your sections done, check the clock. 24 hours from that timestamp is when you’ll be able to start sealing the fabric. You can do this with an iron set on low heat, just
  make sure that you’re constantly keeping it moving.
 Once everything is sealed up and cooled off you can move on the final portion of making the tail! Clip or pin that sucker up so you can sew it, run it through the machine, turn it right side out, and start stuffing! In this case I just used straight polyfil. If you want it to sit in a specific type of position you’ll want to look into putting some wires in there so you can bend and shape it. Once you have the interior ready you can sew it closed and decide what method you’ll want to use to attach it to your costume.
And there you have it! A fresh tail to go with your horns, because those were the unrealistic body goals you were talking about when you started this quarantine.
I’ll see you all next week!


