14 Oct Halloween Remake – Blood Moon Kalista Pt. 2
Good Morning! I hope you all had a lovely first full week of October. I’m fresh off of being the best man at two very good friends’ wedding but I’m awake and ready to talk about cosplay with all of you again regardless! This week we’re going to start taking a look at the process of building my armor pieces so that next week we can discuss decorating them.
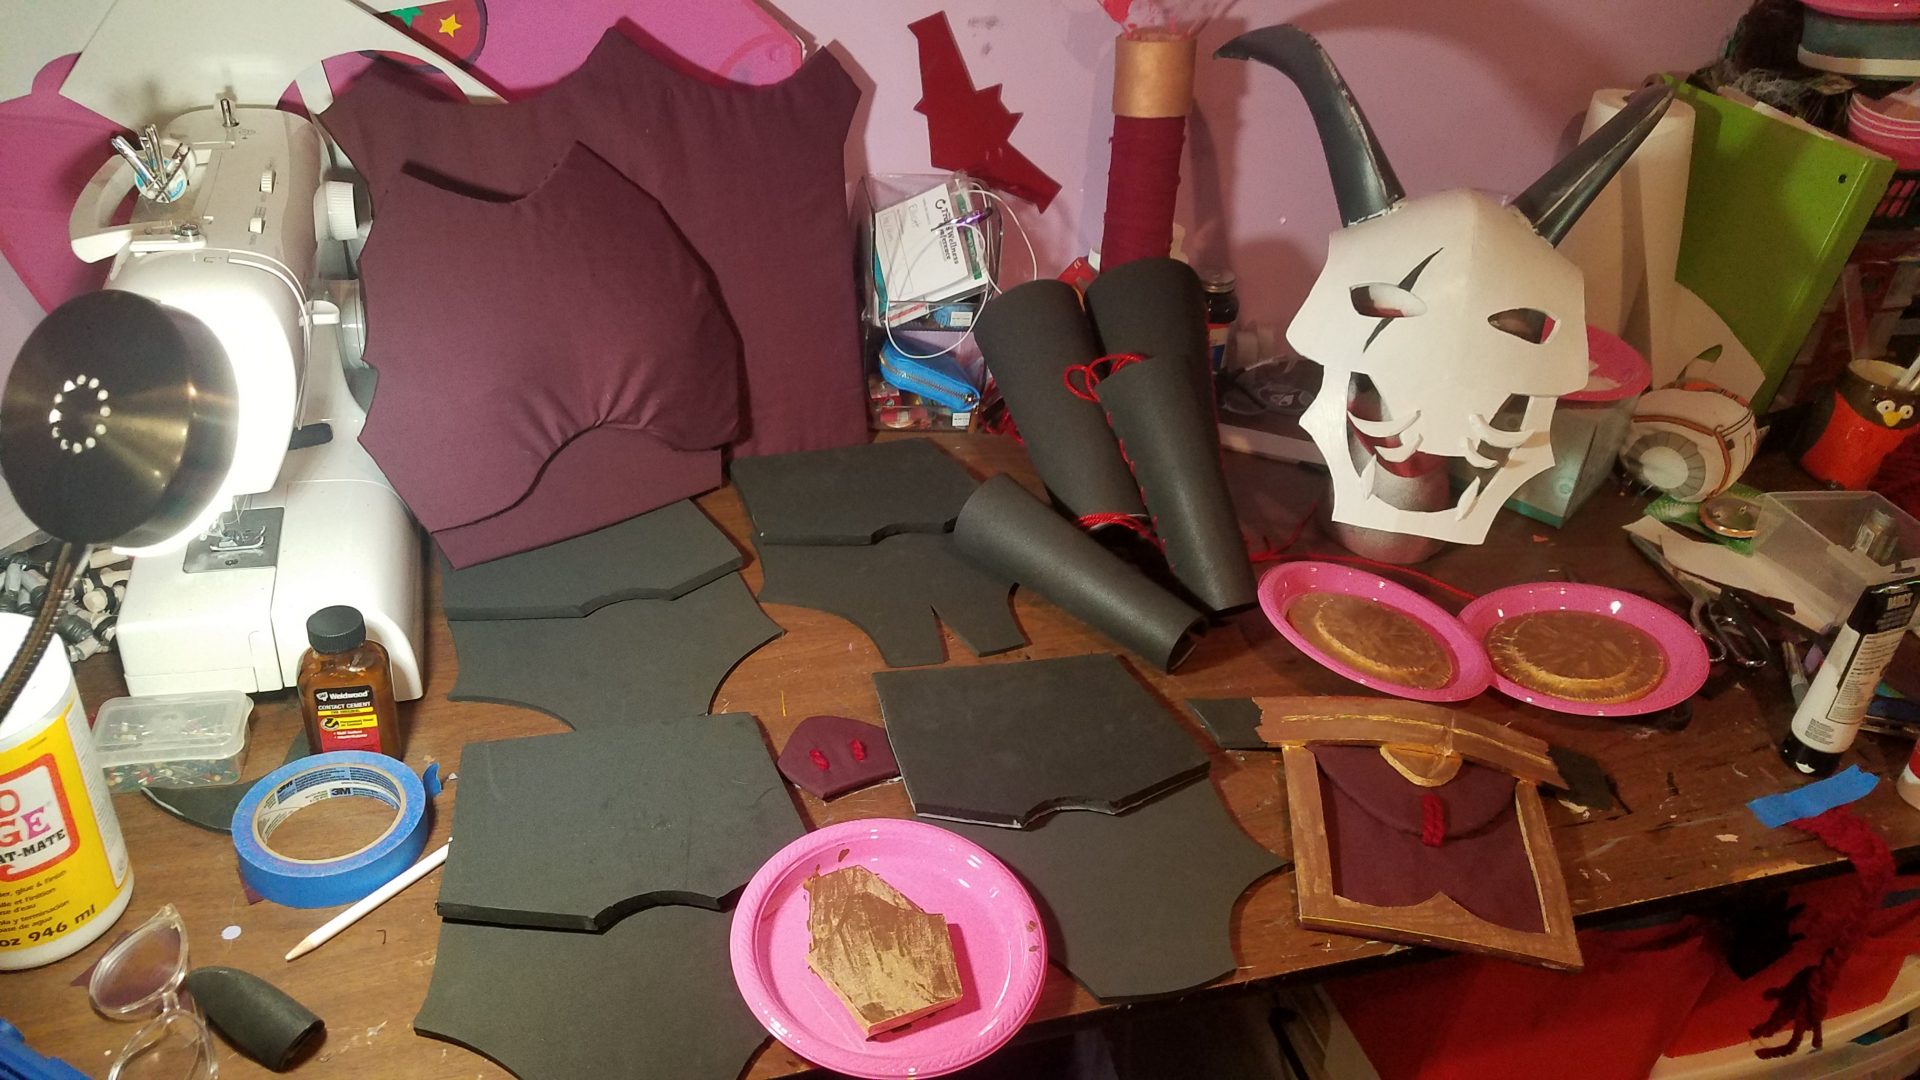
Let’s talk upper body first. When I first made blood moon Kalista, I didn’t make a formal chest plate, because at the time I was just dipping my toes into proper foam armor crafting. So when it was originally constructed it was a sports bra that I glued maroon fabric  and a piece of craft foam on to. This time around I used 10mm craft foam and some actual patterns. The top half of the front piece was made using this pattern once again from Sean Xieng. The back piece was free handed after I took some quick measurements for the width of my back and height of the binder I will be using as an anchor for it in a later post. Pieces were attached together using contact cement, but I did not fill in the gaps in the seams as I will be covering them with fabric rather than paint them as I did with my mask.
The belt pieces were made with a combination of 10mm foam for the top pieces and 5mm  foam for the bottom pieces. Both layers were free handed, although some original pieces got traced where they could be. As for my arm and leg covers I used the same system I almost always use. Measure the tops and bottoms as well as the length, then translate that rhombus style onto a piece of foam. This time however, instead of attempting to work with velcro to shut them together, I decided I would be using yarn that matched the fabric I will later be covering it with. So after cutting out the pieces for my arms and legs I measured out places to cut with my box cutter, hit it with some heat, and tied it off so that they could hopefully keep their rounded shape when it comes time to cover them with fabric.
As for patterns for smaller pieces, the knees were made by tracking some of the round containers I have sitting on my workbench, and the hand patterns were drawn in my graph paper pad before I cleaned them up in FireAlpaca when I was making my horn patterns. As it stands now, all of my armor pieces have been cut and pretty much assembled together. Some are in a halfway state of being decorated, and others are waiting on a couple of deliveries and trips to the store so I can have the supplies to finish them off. 
Next week we’ll get into how I go about decorating everything. But until then I hope you guys continue to have a great month of Halloween, and good luck with the costumes you’ll be making for it!
-Elliott


