27 Jul Maker’s Monday: Creature Features part 2
Hi everyone! Happy Monday, and welcome back to our next Maker’s Monday! Last week I showed how I built my horns for Velvari, and ended saying that hopefully this week I would be making his tail. Unfortunately they were out of the fabric I needed, but since you guys seemed to enjoy the video I posted of Vel’s decorated horns I figured I’d do a quick post this week about how I decorated them. So let’s get into it!
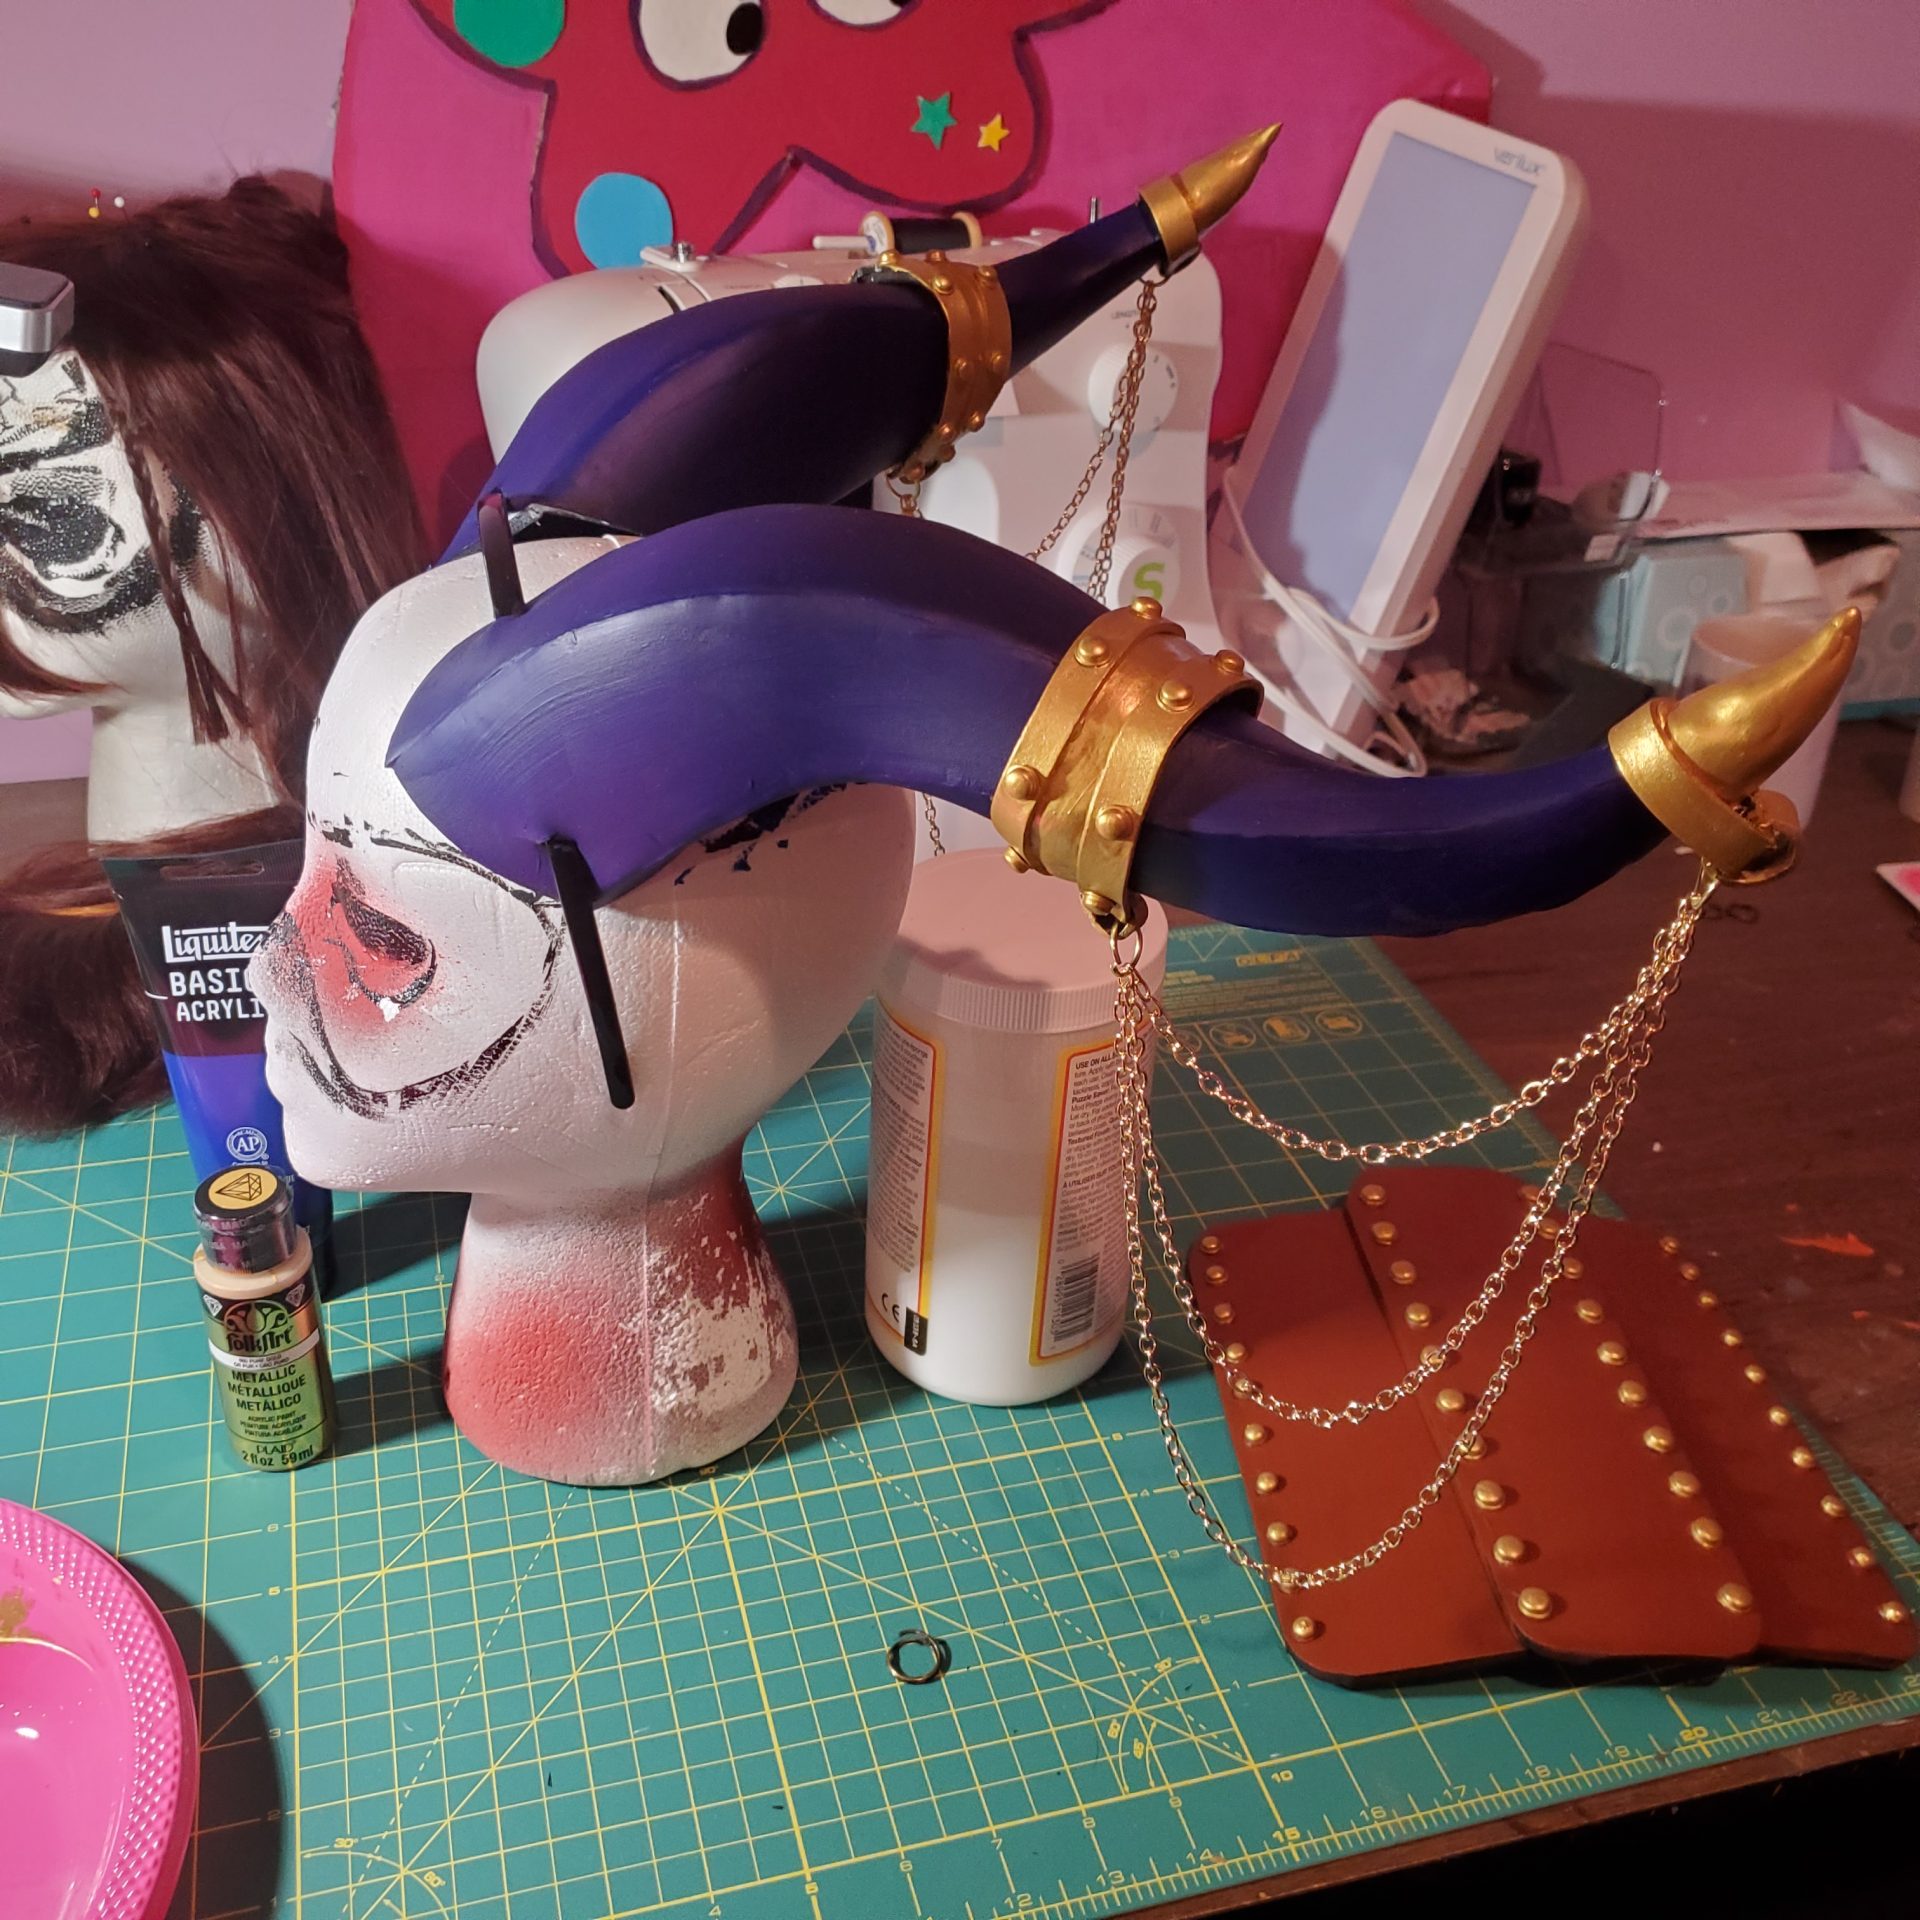
First thing’s first, I need a smoother base to work with. Whenever I have obvious seams in the things I’ve built I like  to use caulk to fill them in. If you use this method though you’ll want to make sure to run a wet finger over the caulk before it dries so that you can smooth it out and avoid too many bumps. Then you’ll want to leave them to dry for a bit because the foam will absorb a bit of the water when you do it. Since I didn’t have them attached to the headband yet when I was doing this I used paper towel holders to keep them upright while they dried.
Now I use black foam to build most of the things I make these days. The caulk is white. So this will have to be fixed before I can start slapping down the real colors. So I’ll be starting the paint process with a matte black paint. You could do spot touching if you want, but I figured I’d just cover the entire thing. Since the c4 bands dried I added some additional details using  2mm craft foam and googly eyes, so I want to make sure I have an even color base for the entirety of the horns. From there I’m starting with the dark blue of the horns, since that’s the larger portion of painting that needed to be done. I’m using a nice dark blue so I could probably get away with only using 2 coats, but in the end I went with 3 just to make sure I didn’t get any patchiness on them.
The gold, because it’s a slightly thinner metallic paint, will also take 3 coats. Even though it’s a smaller area because of the way I had to angle myself to paint a lot of the nooks and crannies it was a bit more time consuming to take care of. The shine of folkart metallics tend to be worth it though in my opinion.

Once all the paint is dried the last thing to do is add chains. I used a 72 inch gold chain that I just snipped in half with some wire cutters. To get the little looping motion I had the clasps open on both sides and fed the chains back and forth at varying lengths 3 times. Then I hoped and prayed it would end up similar on the other side. And it did!  They are a little back heavy so I’m going to be working to figure out how to stabilize them a bit, but I’m very happy with how they look!
And that’s it for now on Vel’s horns! Tune back next week, I should actually be doing his tail this time around.


